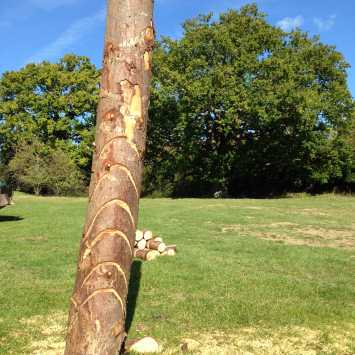
Our small tree felling courses (under 380mm) are carefully structured to build confidence, add knowledge progressively and set students up to work safely in forestry or arboricultural circumstances. This blog series has been written to give a more comprehensive insight into what is actually in a tree felling course. Not only this, but it will also help those in their learning with a more detailed discussion than is given in a typical course handbook, especially around building cut accuracy and full understanding of the function & purpose of cuts.
It also hopefully sets out some of the fundamental principles of safe and controlled chainsaw use. Ideas around learning styles and reflective learning are also threaded through the articles. Following this introduction, we talk about improving felling accuracy and our use of felling simulation, then work through the cuts taught to deal with trees with a range of characteristics – neutral, backward or forward-leaning. Problem-solving and hung up tree techniques make up the final parts of this series of articles.
- Felling course introduction
- Building accuracy - ideas relevant for all cuts
- Standard felling cut - for upright trees
- Split level cut - trees weighted against the desired direction of fell
- Dog tooth cut - heavily leaning trees, they’re only going one way!
- Danish pie - a flexible cut for use in most circumstances
- When things go wrong - such as trapped saws, sat back trees
- Hung up trees - intentional and unintended
A common perception for those starting or contemplating a felling course is that 4 or 5 days is a long time to spend on tree felling, when often at the end of a course our feedback is students wish the course were longer! Well, how difficult can it be to fell a tree? The answer on the face of it is not very. Still, when you look at the range of skills and a breakdown of the course components, it is much more involved looking at felling the tree in the direction you want. However, it would help if you took into account the tree condition and lean, then to process it safely and to be able to deal with a few common problems that crop up.
The entry-level course for aspiring professional chainsaw users are either the 5-day combined (City & Guilds NPTC Units 201,202 and 203) or the four-day felling course which covers City & Guilds NPTC Unit 203. There are pros & cons to these options - it depends whether you are keen to get it all done in an exact timeframe or prefer to spread out the learning and do maintenance, crosscutting and felling with a break in-between. Generally, those that spread the courses get more out of the felling course as they are focused on one assessment and have built a bit more confidence and experience with the saw.
Whatever course gets chosen, the skills are taught and developed throughout the course with a mix of theory, demonstrations, safe practice sessions and then more practice in a woodland site or sites. Some students need more, others need less. Still, a common theme I find is that people are often keen to gain a full theoretical understanding of a cut before they try it. This can’t happen unless you have done it previously as with all practical skills; talking about them is not the same as doing them.
Building Chainsaw Accuracy - Practice
This can be summed up by the following: “Know where your saw is and where you need to cut – job done” But it’s not as easy as that. While some can rapidly get reasonable saw control and cut accurately, many have difficulty and require help from the bottom up. The following ideas are regularly used to develop awareness and help isolate. They then rectify a problem a student may have in developing saw control.
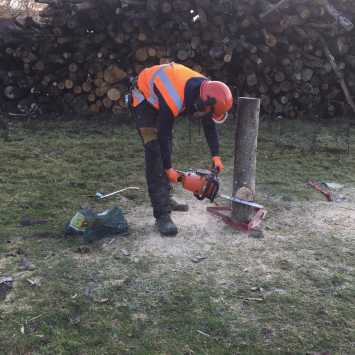
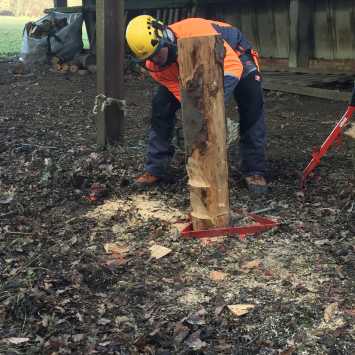
One change we’ve made since the early days is to make felling simulation a more consistent part of our courses, and over the past five years or so a typical first day of felling training could be delivered in our yard rather than a woodland. Making the tree assessment after introducing the cuts helped in student’s successful application of the cuts they know to the tree lean or branch habit they see in a woodland. This is a fundamental idea of delivering information and skills. The process of breaking it down into more manageable chunks means it can be used on most of our courses but is particularly well illustrated later on in this series when talking about split level cuts.
I often introduce the simulation day by asking if anyone has seen the Karate Kid - few have seen the original, but most can identify with the more recent film and know that Daniel San has to wax on wax off, paint the fence and sand the floor. This helps to set the scene and often satisfies those previously unwilling to stop talking or asking questions about how to cut a sink. Daniel San doesn’t realise that he’s learning karate but can apply it without conscious thought later on. Our simulations are not quite the same, but they are based on isolating a skill and having many repetitions without the risk of a tree falling in the wrong direction nor the associated clear up.
So what is felling simulation? It sounds like a reasonably dull computer game but is a way of describing numerous set-ups. You can find a series of felling cuts that can be made in a uniform log without the tree falling, splitting or moving backwards - some of the key risks when felling for real. We used to do this on an ad hoc basis in a woodland environment by felling a suitable tree high up and then leaving this stump for students to cut a series of felling cuts into. I then made up some x frames out of box section steel used together with a ratchet strap, but these required a suitable tree and involved lifting longer sections into position vertically.
Following a visit from Chalky White who was running some emergency tree work courses for us, we were talking about how the site was developing and the problem of running out of suitable small trees for felling under 380mm courses. At the same time, this was a long way off. Chalky also expounded the additional benefits and talked through the process of having some just made for Tim Bendall at the Royal Agricultural College in Cirencester.
| Felling simulation options |
Benefits |
Drawbacks |
| Single felled tree | -Readily available -Very stable -No tools required |
-Have to clear up that tree -Risks of felling high to an instructor -Only available in woodland |
| Metal X frame | -Good top stability -Cheap to make |
-Need quite a tall cordwood to use -Requires adjacent tree to clamp |
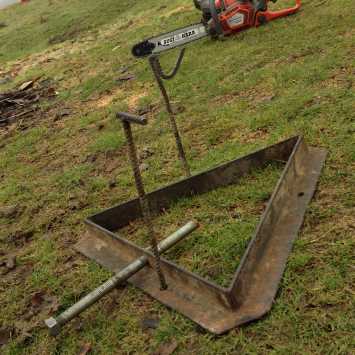
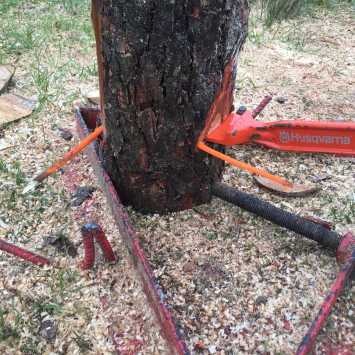
| Metal triangles | -Works with range of diameters and short lengths -Focus on low felling -Set up anywhere |
-Stability can be poor when pushing chain used near the top |
This got us interested and excited about this valuable new component to our felling courses, and I ordered 12m of 50mm angle iron, some M20 threaded bar and nuts and a few fencing pins. Over the Christmas holidays I made up the triangles, and we have been using them ever since. They are so popular that other instructors make a beeline for them and want to use them when not even working for us!
Benefits
- Students see & practice all the under 380mm felling cuts on their first day of felling training
- The non-woodland environment allows better focus on the cut mechanics
- Can complete around 50-70 felling cuts in one day
- Safe introduction to chainsaw in felling cut position
- Simulation can be layered for able students adding direction, safe zone and tool discipline
- Have lunch next to the Woodburner
- Can go back onto the simulator for a problem cut in the woodland
- Improved clarity of cut applicability to a tree in the woodland environment
- Neat link from accurate crosscutting (1m lengths) unit 202


