During a recent Lantra Awards ITA Brushcutter course a Scott Fraser Training clients Husqvarna 545RXT brushcutter equipment was maintained.
On the course the power unit checks comprise;
- Air filter
- Fuel filter
- Spark plug starter recoil
- Cooling system
- Exhaust
- Fuel pipes
- Electrical wire security
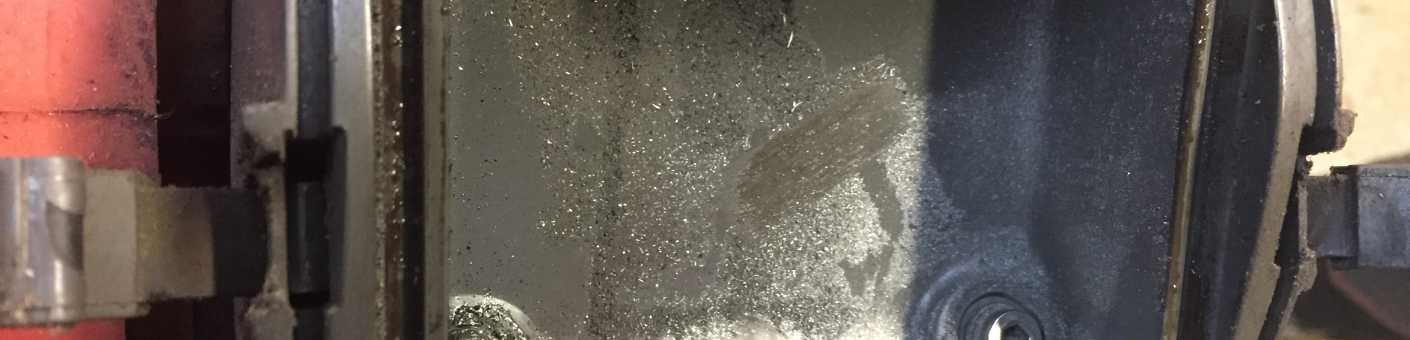
The air filter on this machine was heavily contaminated with dirt and oil. It’s normally a paper element that can be cleaned and maintained a number of times by lightly brushing away larger debris, or cleared via compressed air. Eventually, a replacement filter is required. The clearing saw version of this particular Husqvarna model, does have a washable chainsaw filter that would be more maintainable over time.
However, as can be seen from the photos the air filter housing was heavily contaminated with aluminium powder. Upon closer inspection, we found this was caused by a loose fixing that was rattling in the thread towards the right side of the main engine casting. Perhaps the fixing had been under tensioned with the vibration of the machine over time, damaging the thread or alternatively it had been overtightened initiating the damage.
Metal particles entering the cylinder would likely have caused a lot of damage to the surface of the piston and barrel, shortening the life of the machine.
Moving down the machine, we also noticed another typical brushcutter problem; the handle section had worked loose and slid away from the engine unit mountings. This is easily noticeable, in its early stages, by elevated vibration levels of the machine, as the vibration mountings form the connection between the handle assembly and the engine.
Fixing this problem is a relatively simple job, if the handle has moved, it can be slid back towards the engine and secured. In this case the whole aluminium casting had worked loose and needed the handle unit to be moved further away.
- Loosen all handle fixings
- Remove 2 fuel hoses
- Slide handle assembly towards the gearbox
- Tighten up clutch cover where it attaches the main casting
- Slide handle to ensure anti-vibration mounts are snug
- Refit fuel pipes
- Tighten handle fixings and check for movement
